"Users appreciate code signing."
– Apple Developer Library: Code Signing Guide
There are many nice APIs you might encounter while building apps for iOS or OS X. You could do beautiful animations, test your app really well, or store your data safely in Core Data. But at some point, you will encounter code signing and provisioning. And more often than not, this is when you will start cursing.
If you have ever developed an application for iOS, you have probably fought with code signing or device provisioning at some point. Even as an OS X developer, you cannot avoid signing your code anymore, at least not if you want to be on the Mac App Store or are part of the Developer ID program.
Most of the time, code signing seems like a magical machine that is hard to understand. I will try to shed some light on this machine.
While the process and many of the internals are wrapped inside the iOS system and SDK, we can get a glance by looking at the infrastructure used to sign the app, in addition to looking at how OS X code signing works. Since under the hood, iOS is very similar to OS X, one can figure out a lot by looking both places.
The APIs and technology for signing executable code on OS X appeared on Mac OS X Leopard 10.5 around the time the first iPhone was released. This seems no coincidence, since on the iPhone OS itself, code signing is even more crucial. The iPhone was one of the first mass-market computing platforms after game consoles that relied on code signing from the ground up; iOS simply runs no unsigned code unless the device is jailbroken. Jailbreaking basically disables all the code signing and sandboxing security infrastructure, which is a very dangerous thing to do.
Certificates and Keys
As an iOS developer, chances are you have a certificate, a public key, and a private key on your development machine. These are at the core of the code signing infrastructure. Code signing, like SSL, relies on public-key cryptography based on the X.509 standard.
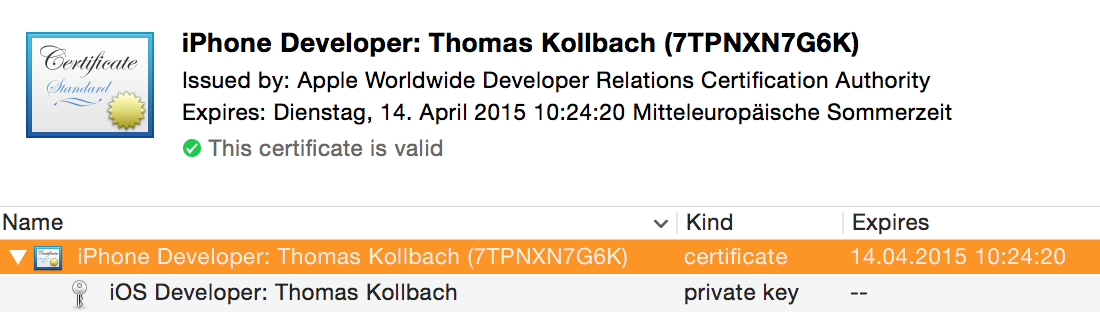
The main utility to manage the X.509 infrastructure on OS X is the Keychain Access utility. In the "My Certificates" section of your development machine, you will find the certificates you have the private key for. To use a certificate for signing, you need the private key, so that your code signing certificates will show up in this list. If you have a private key for a certificate, you can unfold the certificate to show the private key:
To export a certificate from your keychain with the private key, Control-Click the certificate and choose 'Export "Your Certificate Name"' and choose the Personal Information Exchange format (.p12). You will be asked to enter a password to protect this file. Once you are done, anyone who has the p12 file and the password will be able to install the certificate and private key into their own keychain.
Another way to quickly get a glance at the identities on your system that can be used for signing code is with the very versatile security command line tool:
								$ security find-identity -v -p codesigning
  1) 01C8E9712E9632E6D84EC533827B4478938A3B15 "iPhone Developer: Thomas Kollbach (7TPNXN7G6K)"
A certificate is — very broadly speaking — a public key combined with a lot of additional information that was itself signed by some authority (also called a Certificate Authority, or CA) to state that the information in the certificate is correct. In this case, the authority is Apple's authority for developer stuff, the Apple Worldwide Developer Relations CA. This signature expires at some point, which means that anybody checking the certificate will also have to have a clock that is set correctly. This is one of the reasons why setting your system clock back in time can wreak havoc on a lot of things on iOS.
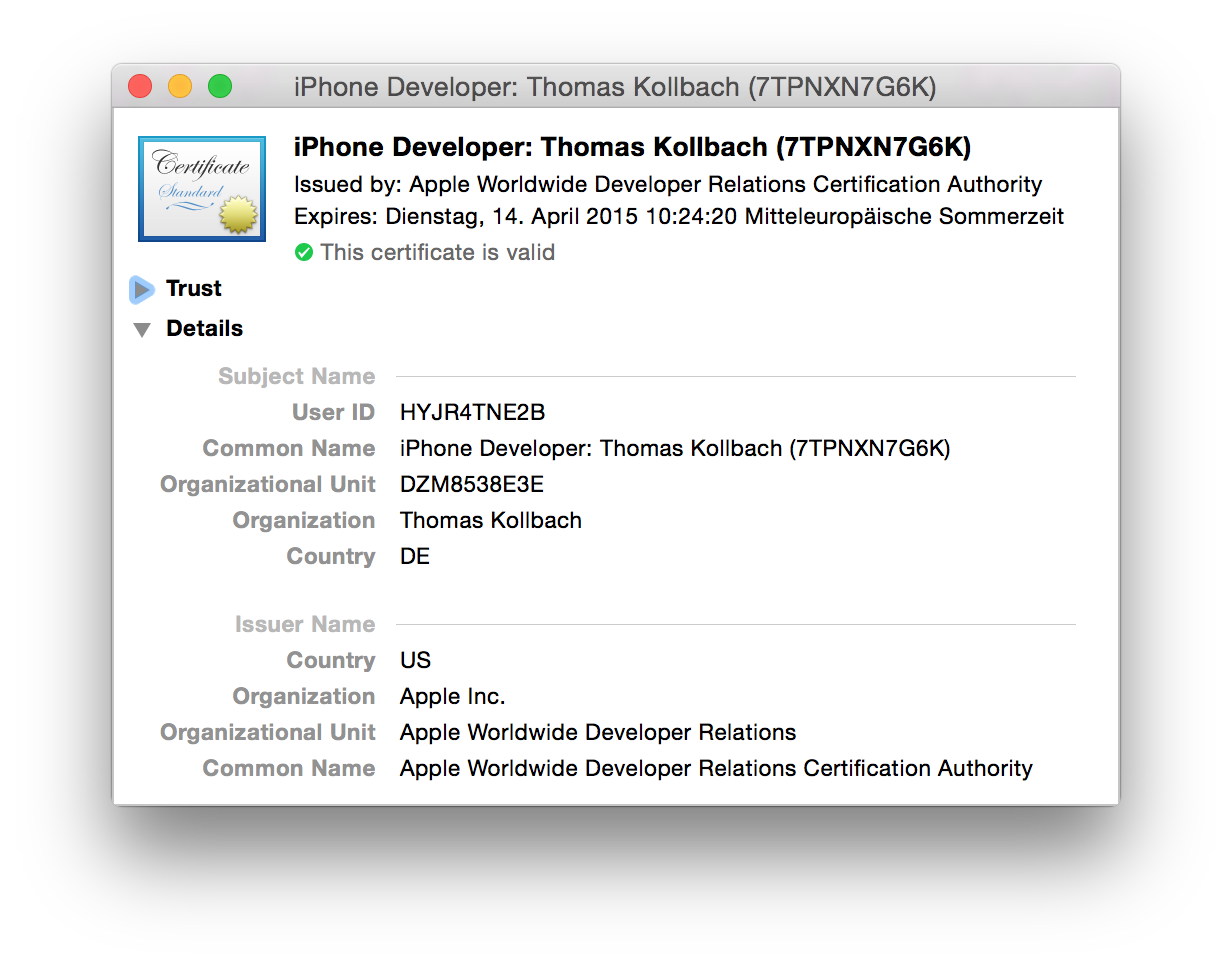
For iOS development, you usually have two certificates: one prefixed with iPhone Developer, and one prefixed with iPhone Distribution. The first one is the one you use to build apps for your devices, and the other one is used to submit apps. This fact is baked into certificates. If you open the certificate in Keychain Utility, you will see a lot of extension entries. Look for the last one, labeled Apple Developer Certificate (Submission) , or Apple Developer Certificate (Development), depending on the type of certificate — iOS uses this extension to determine if your app runs in development mode or distribution mode, and based on this, which rules that apply.
In addition to the certificate with the signed public key in it, we also need the private key. This private key is what you use to sign the binaries with. Without the private key, you cannot use the certificate and public key to sign anything.
The signing itself is performed by the codesign command line tool. If you compile an application with Xcode, it will be signed by calling codesign after building the application — and codesign is also the tool that gives you so many nice and helpful error messages. You set the code signing identity in the project settings:
![]()
Note that Xcode only lets you pick code signing identities in this setting if you have a public and private key in your keychain. So if you expect one to be there, but it isn't, the first thing to check is if you have the private key in your keychain next to your certificate. Here, you also see the division between the development and distribution profiles. If you want to debug an app, you need to sign it with a key pair for development. If you want to distribute it either to testers or the App Store, you need to sign it with a key pair for distribution.
For a long time, this was the only setting regarding code signing, short of turning it off.
With Xcode 6, the option of setting a provisioning profile appeared in the project settings. If you set a provisioning profile, you can only choose the key pair that has a public key embedded in the certificate of your provisioning profile, or you can have Xcode pick the correct one automatically. But more on that later; let's look at code signing first.
Anatomy of a Signed App
The signature for any signed executable is embedded inside the Mach-O binary file format, or in the extended file system attributes if it's a non-Mach-O executable, such as a shell script. This way, any executable binary on OS X and iOS can be signed: dynamic libraries, command line tools, and .app bundles. But it also means that the process of signing your program actually modifies the executable file to place the signature data inside the binary file.
If you have a certificate and its private key, it's simple to sign a binary by using the codesign tool. Let's sign Example.app with the identity listed above:
$ codesign -s 'iPhone Developer: Thomas Kollbach (7TPNXN7G6K)' Example.app
This can be useful, for example, if you have an app bundle that you want to re-sign. For that, you have to add the -f flag, and codesign will replace an existing signature with the one you choose:
$ codesign -f -s 'iPhone Developer: Thomas Kollbach (7TPNXN7G6K)' Example.app
The codesign tool also gives you information about the code signing status of an executable, something that can be especially helpful if things go wrong.
For example, $ codesign -vv -d Example.app will tell you a few things about the code signing status of Example.app:
								Executable=/Users/toto/Library/Developer/Xcode/DerivedData/Example-cfsbhbvmswdivqhekxfykvkpngkg/Build/Products/Debug-iphoneos/Example.app/Example
Identifier=ch.kollba.example
Format=bundle with Mach-O thin (arm64)
CodeDirectory v=20200 size=26663 flags=0x0(none) hashes=1324+5 location=embedded
Signature size=4336
Authority=iPhone Developer: Thomas Kollbach (7TPNXN7G6K)
Authority=Apple Worldwide Developer Relations Certification Authority
Authority=Apple Root CA
Signed Time=29.09.2014 22:29:07
Info.plist entries=33
TeamIdentifier=DZM8538E3E
Sealed Resources version=2 rules=4 files=120
Internal requirements count=1 size=184
The first thing you can look at is the three lines starting with Authority. These tell you which certificate it was that actually signed this app. In this case, it was my certificate, the iPhone Developer: Thomas Kollbach (7TPNXN7G6K) certificate, which in turn was signed by Apple Worldwide Developer Relations Certification Authority, which is signed by, you guessed it, the Apple Root CA.
It also tells you something about the code in Format: it's not just a bare executable, but a bundle that contains an arm64 binary. As you can see from the Executable path, this is a debug build, so it's a thin binary.
Included among a bit of other diagnostics information are two more interesting entries. Identifier is the bundle identifier I set in Xcode. TeamIdentifier identifies my team (this is what is used by the system to see that apps are published by the same developer). Note that iOS distribution certificates have this very identifier in their names as well, which is useful if you want to distinguish many certificates under the same name.
Now the binary is signed with a certificate. This seals the application, much like a seal of wax sealed an envelope in the Middle Ages. So let's check if the seal is unbroken:
								$ codesign --verify Example.app
$
This, like any good UNIX tool, tells you the signature is OK by printing nothing. So let's break the seal by modifying the binary:
								$ echo 'lol' >> Example.app/Example
$ codesign --verify Example.app
Example.app: main executable failed strict validation
So code signing works as expected. Mess with the signed app and the seal is broken.
Bundles and Resources
For command line tools or scripts, a single executable file is signed, but iOS and OS X applications and frameworks are bundled together with the resources they need. These resources can include images or translation files, but also more critical application components such as XIB/NIB files, archives, or even certificates. Therefore, when signing a bundled application, the resources are signed as well.
For this purpose, the signing process creates a _CodeSignature/CodeResources file inside the bundle. This file is used to store the signature of all files in the bundle that are signed. You can take a look at the list for yourself, as this is just a property list file.
In addition to the list of files and their signatures, this property list contains a set of rules about which resources should be considered in code signing. With the release of OS X 10.10 DP 5 and 10.9.5, Apple changed the code signing format, especially regarding these resource rules. If you use the codesign tool on 10.9.5 or later, you will find four sections in the CodeResources file: two named rules and files for older versions, and two named files2 and rules2 for the new version 2 code signing. The main change is that now you cannot exclude resources from being signed. You used to be able to use a file called ResourceRules.plist inside of the signed bundle to specify files which should not be considered when checking if the seal of a bundle was broken. As of the version 2 code signing, this does not work anymore. All code and resources must be signed — no exceptions. With version 2, the rules only specify that executable bundles inside of a bundle, such as extensions, are signed bundles themselves, and should be checked individually.
Entitlements and Provisioning
Up to this point, we have assumed that all certificates are created equally, and that — if we have a valid certificate — code signing is validated against this. But of course this is not the only rule that is applied. The system always evaluates certain rules to see if your code is allowed to run.
These rules are not always the same in all cases. For example, Gatekeeper on OS X can be configured to apply a different policy when starting an application, which is done by changing the setting in the security preferences. Setting this to "Trusted Developers & Mac App Store" requires the apps to be signed by a certificate issued to either a Mac App Store developer for app distribution or a Developer ID certificate. This is controlled by a system tool called spctl, which manages the system's security assessment policy.
On iOS, however, the rules are different. Neither user nor developer can change them: you need an Apple developer or distribution certificate to run an app on iOS.
But even if you can run an app, there are restrictions on what your app can do. These restrictions are managed by the sandbox. It is important to realize the distinction between the sandbox and the code signing infrastructure. Code signing is used to ensure that the application actually contains only what it says on the box — nothing more and nothing less. The sandbox restricts access to system resources. Both systems work hand in hand, both can keep your code from running, and both can cause strange errors in Xcode. But in everyday development, the sandbox is what gets in your way more often than code signing. When it does, it is mostly due to a mechanism called entitlements.
Entitlements
Entitlements specify which resources of the system an app is allowed to use, and under what conditions. Basically, it is a configuration list for the sandbox on what to allow and what to deny your application.
Entitlements are specified in — you might have guessed it at this point — a plist format. Xcode provides them to the codesign command using the --entitlements option. The format looks like this:
								<?xml version="1.0" encoding="UTF-8"?>
<!DOCTYPE plist PUBLIC "-//Apple//DTD PLIST 1.0//EN" "http://www.apple.com/DTDs/PropertyList-1.0.dtd">
<plist version="1.0">
<dict>
    <key>application-identifier</key>
    <string>7TPNXN7G6K.ch.kollba.example</string>
    <key>aps-environment</key>
    <string>development</string>
    <key>com.apple.developer.team-identifier</key>
    <string>7TPNXN7G6K</string>
    <key>com.apple.developer.ubiquity-container-identifiers</key>
    <array>
            <string>7TPNXN7G6K.ch.kollba.example</string>
    </array>
    <key>com.apple.developer.ubiquity-kvstore-identifier</key>
    <string>7TPNXN7G6K.ch.kollba.example</string>
    <key>com.apple.security.application-groups</key>
    <array>
            <string>group.ch.kollba.example</string>
    </array>
    <key>get-task-allow</key>
    <true/>
</dict>
</plist>
This is the XML generated by Xcode after clicking around in the Capabilities tab and enabling a few things. Xcode automatically generates an .entitlements file and adds entries to it, as needed. This file is also provided to the codesign tool when building this app, and is the reference on the entitlements your app requests. These entitlements should all be enabled in the developer center's App ID, and embedded in the provisioning profile, but more on that later. The entitlements file used when building the app can be set up in the Code Signing Entitlements build setting.
I configured this application to use iCloud key-value storage (com.apple.developer.ubiquity-kvstore-identifier) and iCloud document storage (com.apple.developer.ubiquity-container-identifiers), added it to an App Group (e.g. for sharing data with extensions, com.apple.security.application-groups), and enabled push notifications (aps-environment). This is also a development build, so I want to attach the debugger, which means setting get-task-allow to true is required. In addition to that, it includes the app identifier, which is the bundle identifier prefixed by the team identifier, also listed separately.
Of course, you cannot just claim entitlements as you wish. There are certain rules in place that determine if you can use a certain entitlement or not. For example, an app with get-task-allow set to true is only allowed to run if the app is signed with a development certificate. The same is true for the aps-environment that you are allowed to use.
The list of entitlements that are available varies betweens OS versions, so an exhaustive list is hard to come by. At least all of the capabilities mentioned in the Adding Capabilities section of the Xcode documentation require entitlements.
The specific entitlements will be embedded in the signature of an application. If you are having trouble, it can help to look at what the signature actually says about the entitlements: $ codesign -d --entitlements - Example.app will show an XML property list similar to the one above. You could use this to add it to a build script to ensure that the built app always contains the push notification entitlement, and is therefore able to register for push notifications. The more of Apple's infrastructure you use, the more important this gets. Since Xcode 6, the entitlements list you specify is also embedded in the app bundle as Example.app.xcent. As far as I can tell, this is used for providing more helpful error messages when provisioning errors occur.
Provisioning Profiles
There is one component of the code signing and sandbox machinery that binds signing, entitlements, and the sandbox together: provisioning profiles.
Every iOS developer has probably spent a lot of hours fixing the provisioning profiles setup, and this is where a lot of problems start.
A provisioning profile is a container for the information needed by the operating system to decide if it can let your app run. This means that if there is trouble with your provisioning profiles, it can become really annoying to fix.
A provisioning profile is a collection of all the components needed to determine if a particular app can run on a particular device. Provisioning profiles are used to enable app debugging on development devices, and also for ad-hoc and enterprise distribution. Xcode will embed the provisioning profile you select in the project settings within the app. As mentioned before, this selection has only been possible since Xcode 6. With Xcode 5 and before, the profile was picked by Xcode based on the certificate you chose when signing the app. As you can have multiple provisioning profiles with the same certificate, this can be a non-deterministic process, so it's always a good idea to select your provisioning profile, now that the option exists.

So let's have a closer look at a provisioning profile. If you are looking for a file to play with, look inside ~/Library/MobileDevices/Provisioning Profiles, which is where Xcode keeps all the profiles downloaded from Apple's developer portal.
A provisioning profile is — you might be surprised at this point — not a property list. It is a file encoded in the Cryptographic Message Syntax (or CMS for short, but that is a really bad search keyword), which you might have encountered if you've ever dealt with S/MIME mail or certificates. It is specified in detail by the Internet Engineering Task force in RFC 3852.
Using the CMS format to encode a provisioning profile allows the profile to be signed, so that it cannot be changed once it has been issued by Apple. This signature is not the same as the code signature of the app itself. Instead, it is signed directly by Apple after being generated by the developer portal.
You can read this format with some versions of OpenSSL, but not the one that ships with OS X. Luckily for us, the security command line utility supports decoding the CMS format. So let's have a look at a .mobileprovision file:
$ security cms -D -i example.mobileprovision
This will output the contents of the signed message to standard output. If you follow along, you will, once again, see XML of a property list.
This property list is the actual provisioning profile that iOS uses to determine if your app can run on a particular device. A provisioning profile is identified by its UUID. This is the reference that Xcode uses when you select a particular provisioning profile in the build settings in Xcode.
The first key is to look at DeveloperCertificates, which is a list of all certificates that an app using this provisioning profile can be signed with. If you sign the app with a certificate not in this list, it will not run, no matter if the certificate used for signing is valid or not. The certificates are Base64 encoded and in PEM format (Privacy Enhanced Mail, RFC 1848). To take a closer look at one, copy and paste the encoded text into a file, like this:
								-----BEGIN CERTIFICATE-----
MIIFnjCCBIagAwIBAgIIE/IgVItTuH4wDQYJKoZIhvcNAQEFBQAwgZYxCzA…
-----END CERTIFICATE-----`
Then let OpenSSL do the hard work: openssl x509 -text -in file.pem.
Going further along the provisioning profile, you might notice that the key Entitlements contains the entitlements for your app, with the same keys as documented in the Entitlements section.
These are the entitlements as configured on the developer portal in the App ID section when downloading your provisioning profile. Ideally, they should be in sync with the ones Xcode adds when signing the app, but this can break. And when it does, it is one of the most annoying things to fix.
For example, if you add an iCloud key-value store entitlement (com.apple.developer.ubiquity-kvstore-identifier) in Xcode, but do not update, re-download, and reconfigure the provisioning profile, the provisioning profile states that you do not have this entitlement. If you want to use it, iOS will refuse to let you run your application. This is the reason why a profile will be shown as invalid when you edit the capabilities of your App ID on the developer portal.
If you are looking at a development certificate, you will also find a ProvisionedDevices key, which contains a list of all the devices you set up for this provisioning profile. Because the profile needs to be signed by Apple, you need to download a new one each time you add a device to the developer portal.
Conclusion
The code signing and provisioning machinery might be one of the most complex things an iOS developer has to deal with, short of coding. It's certainly a very different experience then just compiling and running your code like you would on a Mac or PC.
While it helps to understand the components at work, it still can get very cumbersome to keep all settings and tools under control — especially when working in teams, passing around certificates and profiles can be a very unwieldy task. While Apple tried to improve things in the last few releases of Xcode, I'm not sure every change is an improvement for the better. It certainly is a big dent in any developer's productivity to deal with code signing.
Although all of this effort is very tedious for the developer, it has made iOS arguably one of the most secure end-user computing platforms out there. If you keep an eye on the security-related news, each time there is a new Trojan or malware, such as the infamous FinFisher that claims to work on iOS, look at the fine print. I have yet to encounter iOS-targeted malware where it did not say "requires jailbreak" in the fine print.
So going through all this hassle isn't for naught.