Drawing Trees in SwiftUI
For a new project, we need to draw tree diagrams in SwiftUI. In this post, we'll walk you through our attempts, and show how we use SwiftUI’s preference system to draw clean and interactive diagrams with minimal code.
Our trees have values at the nodes, and any number of children:
								struct Tree<A> {
    var value: A
    var children: [Tree<A>] = []
    init(_ value: A, children: [Tree<A>] = []) {
        self.value = value
        self.children = children
    }
}
For example, here's a simple binary tree that's Int-based:
								let binaryTree = Tree<Int>(50, children: [
    Tree(17, children: [
        Tree(12),
        Tree(23)
    ]),
    Tree(72, children: [
        Tree(54),
        Tree(72)
    ])
])
As a first step, we can draw the nodes of the tree recursively: for each tree, we create a VStack containing the value and its children. The children themselves are drawn using an HStack. We require that each element is identifiable so that we can use them with a ForEach. Since Tree is generic over the node values, we also need to provide a function that turns a node value into a view:
								struct DiagramSimple<A: Identifiable, V: View>: View {
    let tree: Tree<A>
    let node: (A) -> V

    var body: some View {
        return VStack(alignment: .center) {
            node(tree.value)
            HStack(alignment: .bottom, spacing: 10) {
                ForEach(tree.children, id: \.value.id, content: { child in
                    DiagramSimple(tree: child, node: self.node)
                })
            }
        }
    }
}
We are almost ready to draw our tree. There is one problem we still have to solve: the integers in our example binary tree do not conform to the Identifiable protocol. Rather than conforming a type we don't own (Int) to a protocol we don't own (Identifiable), we will wrap each integer in the tree in a new object that is identifiable. This will be useful when we want to modify our tree later on; by being able to uniquely identify elements we can have great animations. Here's the extremely simple wrapper class we're going to use:
								class Unique<A>: Identifiable {
    let value: A
    init(_ value: A) { self.value = value }
}
To transform our tree of type Tree<Int> to a tree of type Tree<Unique<Int>>, we add map to our tree type and use it to wrap each integer within a Unique object:
								extension Tree {
    func map<B>(_ transform: (A) -> B) -> Tree<B> {
        Tree<B>(transform(value), children: children.map { $0.map(transform) })
    }
}

let uniqueTree: Tree<Unique<Int>> = binaryTree.map(Unique.init)
Now we're able to create the diagram view and render a first tree:
								struct ContentView: View {
    @State var tree = uniqueTree
    var body: some View {
        DiagramSimple(tree: tree, node: { value in
            Text("\(value.value)")
        })
    }
}
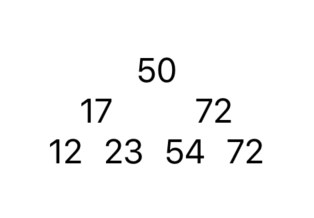
Our tree looks pretty minimalistic:
To add some styling to the nodes, we create a view modifier that wraps each element view in a frame, adds a white circle with a black stroke as background, and some padding around everything:
								struct RoundedCircleStyle: ViewModifier {
    func body(content: Content) -> some View {
        content
            .frame(width: 50, height: 50)
            .background(Circle().stroke())
            .background(Circle().fill(Color.white))
            .padding(10)
    }
}
To use this new view modifier we have to change our ContentView:
								struct ContentView: View {
    @State var tree: Tree<Unique<Int>> = binaryTree.map(Unique.init)
    var body: some View {
        DiagramSimple(tree: tree, node: { value in
            Text("\(value.value)")
            	.modifier(RoundedCircleStyle())
        })
    }
}
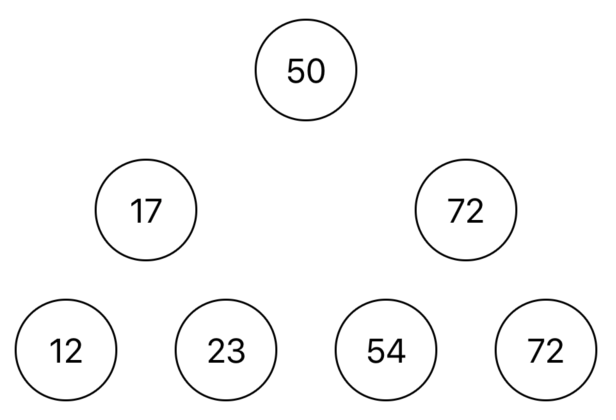
This is starting to look much better:
However, we're still missing the edges between nodes, so it's hard to see which nodes are connected. To draw these, we need to hook into the layout system. First, we need to collect the center point of each node, and then draw lines from each node's center to its children's centers.
To collect all the center points, we use SwiftUI's preference system. Preferences are the mechanism used to communicate values up the view tree, from children to their ancestors. Any child in the view tree can define a preference, and any ancestor can read that preference.
As a first step, we'll define a new PreferenceKey that stores a dictionary. The PreferenceKey protocol has two requirements: a default value, in case a subtree doesn't define a preference, and a reduce method, that is used to combine the preference values from multiple view subtrees.
								struct CollectDict<Key: Hashable, Value>: PreferenceKey {
    static var defaultValue: [Key:Value] { [:] }
    static func reduce(value: inout [Key:Value], nextValue: () -> [Key:Value]) {
        value.merge(nextValue(), uniquingKeysWith: { $1 })
    }
}
In our implementation the default value is an empty dictionary, and the reduce method merges multiple dictionaries into one.
With this preference key in place, we can now use .anchorPreference in the diagram view to pass an anchor up the view tree. To use our generic CollectDict as preference key, we have to specify the generic parameters of CollectDict: Key is the node's identifier, and Value is Anchor<CGPoint> (think of an Anchor<CGPoint> as a way to specify a CGPoint that can be resolved in the coordinate system of another view later on):
								struct Diagram<A: Identifiable, V: View>: View {
    let tree: Tree<A>
    let node: (A) -> V

    typealias Key = CollectDict<A.ID, Anchor<CGPoint>>

    var body: some View {
        return VStack(alignment: .center) {
            node(tree.value)
               .anchorPreference(key: Key.self, value: .center, transform: {
                   [self.tree.value.id: $0]
               })
            HStack(alignment: .bottom, spacing: 10) {
                ForEach(tree.children, id: \.value.id, content: { child in
                    Diagram(tree: child, node: self.node)
                })
            }
        }
    }
}
Now we can use backgroundPreferenceValue to read out all the node centers for our current tree. To resolve the anchors into actual CGPoints, we have to use a GeometryReader. We loop over all the children, then draw a line from the center of the current tree's root node to the child node's center:
								struct Diagram<A: Identifiable, V: View>: View {
    // ...

    var body: some View {
        VStack(alignment: .center) {
            // ...
        }.backgroundPreferenceValue(Key.self, { (centers: [A.ID: Anchor<CGPoint>]) in
            GeometryReader { proxy in
                ForEach(self.tree.children, id: \.value.id, content: { child in
                    Line(
                        from: proxy[centers[self.tree.value.id]!],
                        to: proxy[centers[child.value.id]!]
                    ).stroke()
                })
            }
        })
    }
}
Line is a custom Shape that has absolute from and to coordinates. We also add both points to the animatableData, so that SwiftUI knows how to animate lines (to be able to use CGPoint as animatble data, we have to conform it to the VectorArithmetic protocol. This conformance is ommitted here for brevity):
								struct Line: Shape {
    var from: CGPoint
    var to: CGPoint
    var animatableData: AnimatablePair<CGPoint, CGPoint> {
        get { AnimatablePair(from, to) }
        set {
            from = newValue.first
            to = newValue.second
        }
    }

    func path(in rect: CGRect) -> Path {
        Path { p in
            p.move(to: self.from)
            p.addLine(to: self.to)
        }
    }
}
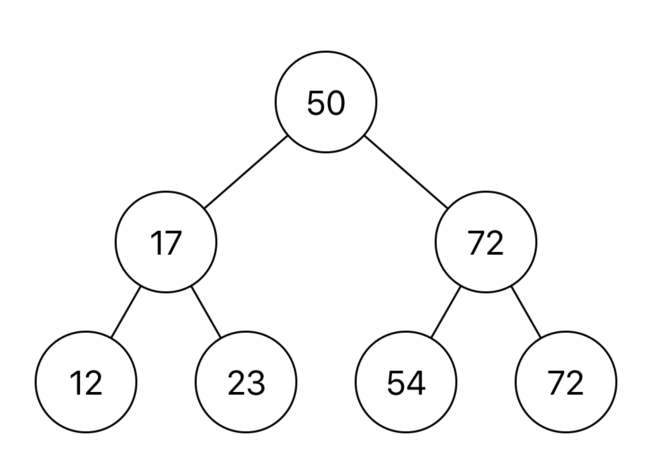
Given all of the machinary above, we finally can use the Diagram view and draw a nice tree with edges:
								struct ContentView: View {
    @State var tree = uniqueTree
    var body: some View {
        Diagram(tree: tree, node: { value in
            Text("\(value.value)")
                .modifier(RoundedCircleStyle())
        })
    }
}
What's more, our tree supports animations as well. Because we wrapped each element in a Unique object, we can animate between different states. For example, when we insert a new number into the tree, SwiftUI can animate that insertion for us:
We have also used this technique to draw different kinds of diagrams. For an upcoming project, we wanted to visualize the structure of SwiftUI's view tree. By using Mirror we can access the type of a view's body property, which can look like this (for a simple view):
VStack<TupleView<(ModifiedContent<ModifiedContent<ModifiedContent<Button<Text>,_PaddingLayout>,_BackgroundModifier<Color>>,_ClipEffect<RoundedRectangle>>,_ConditionalContent<Text, Text>)>>
We then parse that into a Tree<String>, simplify it slightly, and visualize it using the Diagram view above:
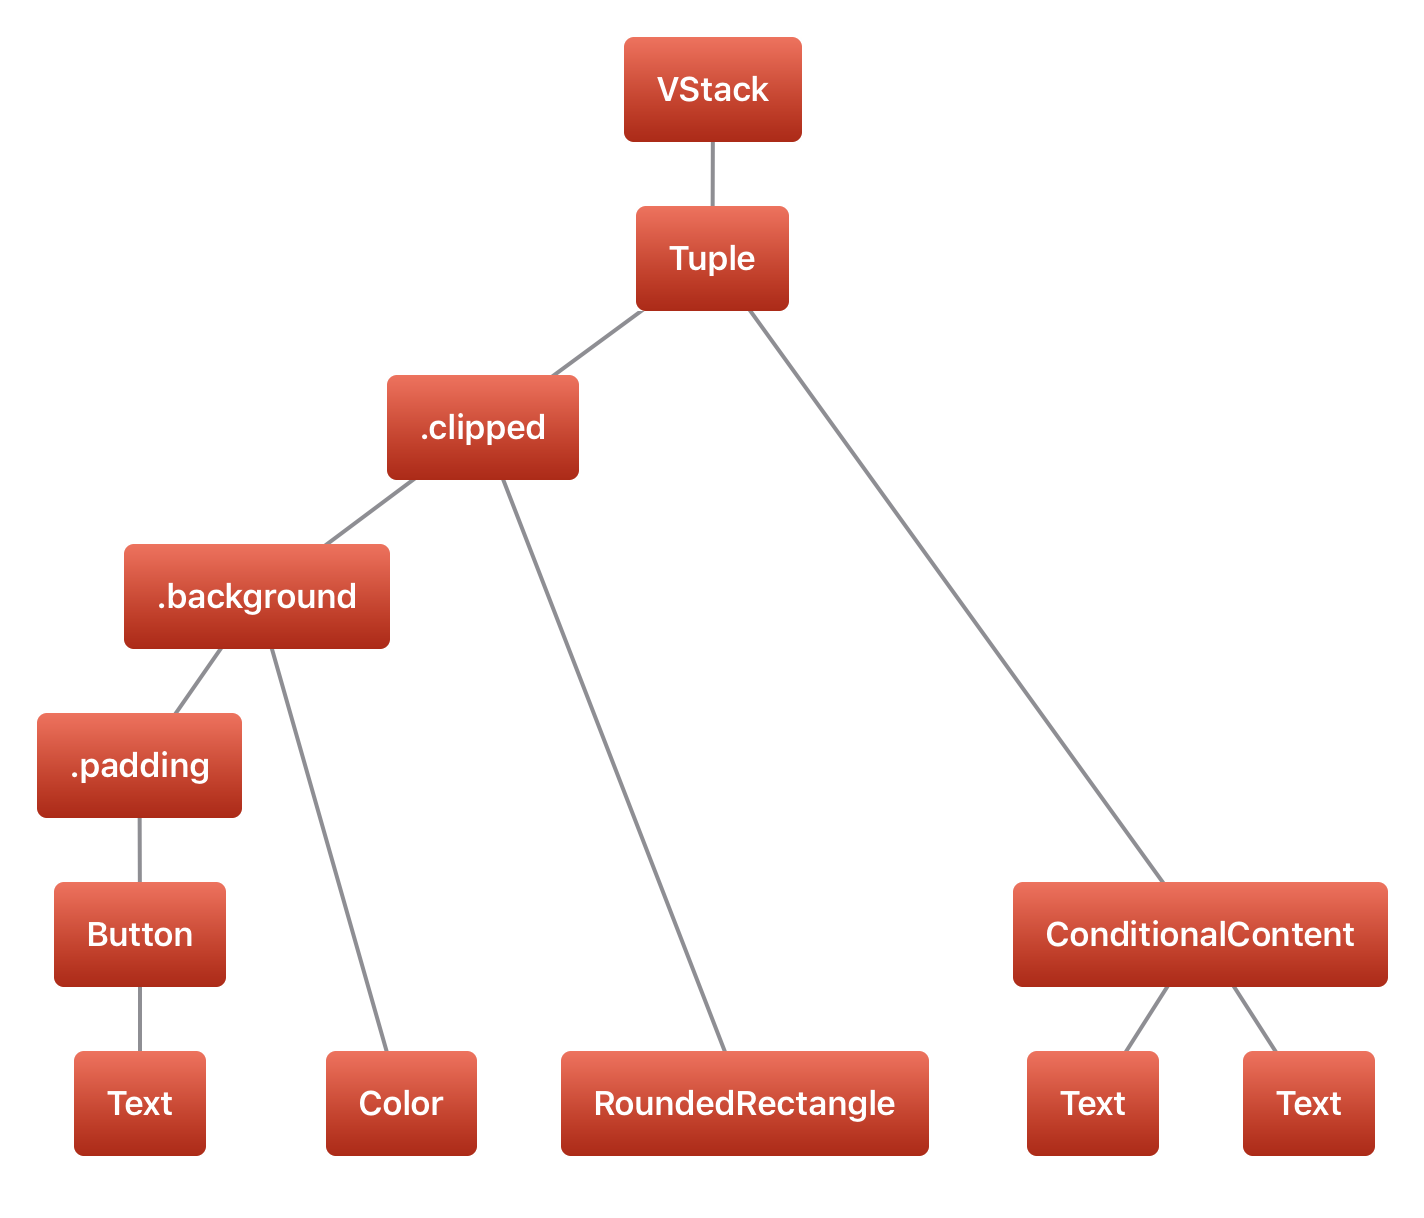
Using SwiftUI's built-in features like shapes, gradients, and some padding we were able to draw the above tree with minimal code. It's also really easy to make the trees interactive: you can wrap each node in a Button, or add other controls inside the nodes. We've been using this in presentations, to generate static diagrams and to just quickly visualize things.
If you'd like to experiment for yourself, you're welcome to try out the full code for the binary tree, and drawing a tree hierarchy of SwiftUI's view hierarchy.
We add new Swift Talk episodes to our SwiftUI Collection every week. Our latest public episode recreates the iOS Stopwatch app, starting with custom buttons. At over 9 hours, and 24 episodes, we're learning a lot!
To learn with us, become a subscriber.
