Swift Tip: A Functional Interface for Imperative Code
In last week's Swift Talk episode, Refactoring Imperative Layout Code, we refactored an imperative flow layout algorithm into an algorithm with a functional interface. In this article, we'll implement a justified version of this flow layout.
Thanks to the functional interface, we can plug it in by changing a single line of code. With no implicit state, the interface makes it easy to swap out implementations, and also makes it possible to write unit tests without having to instantiate UIViews.
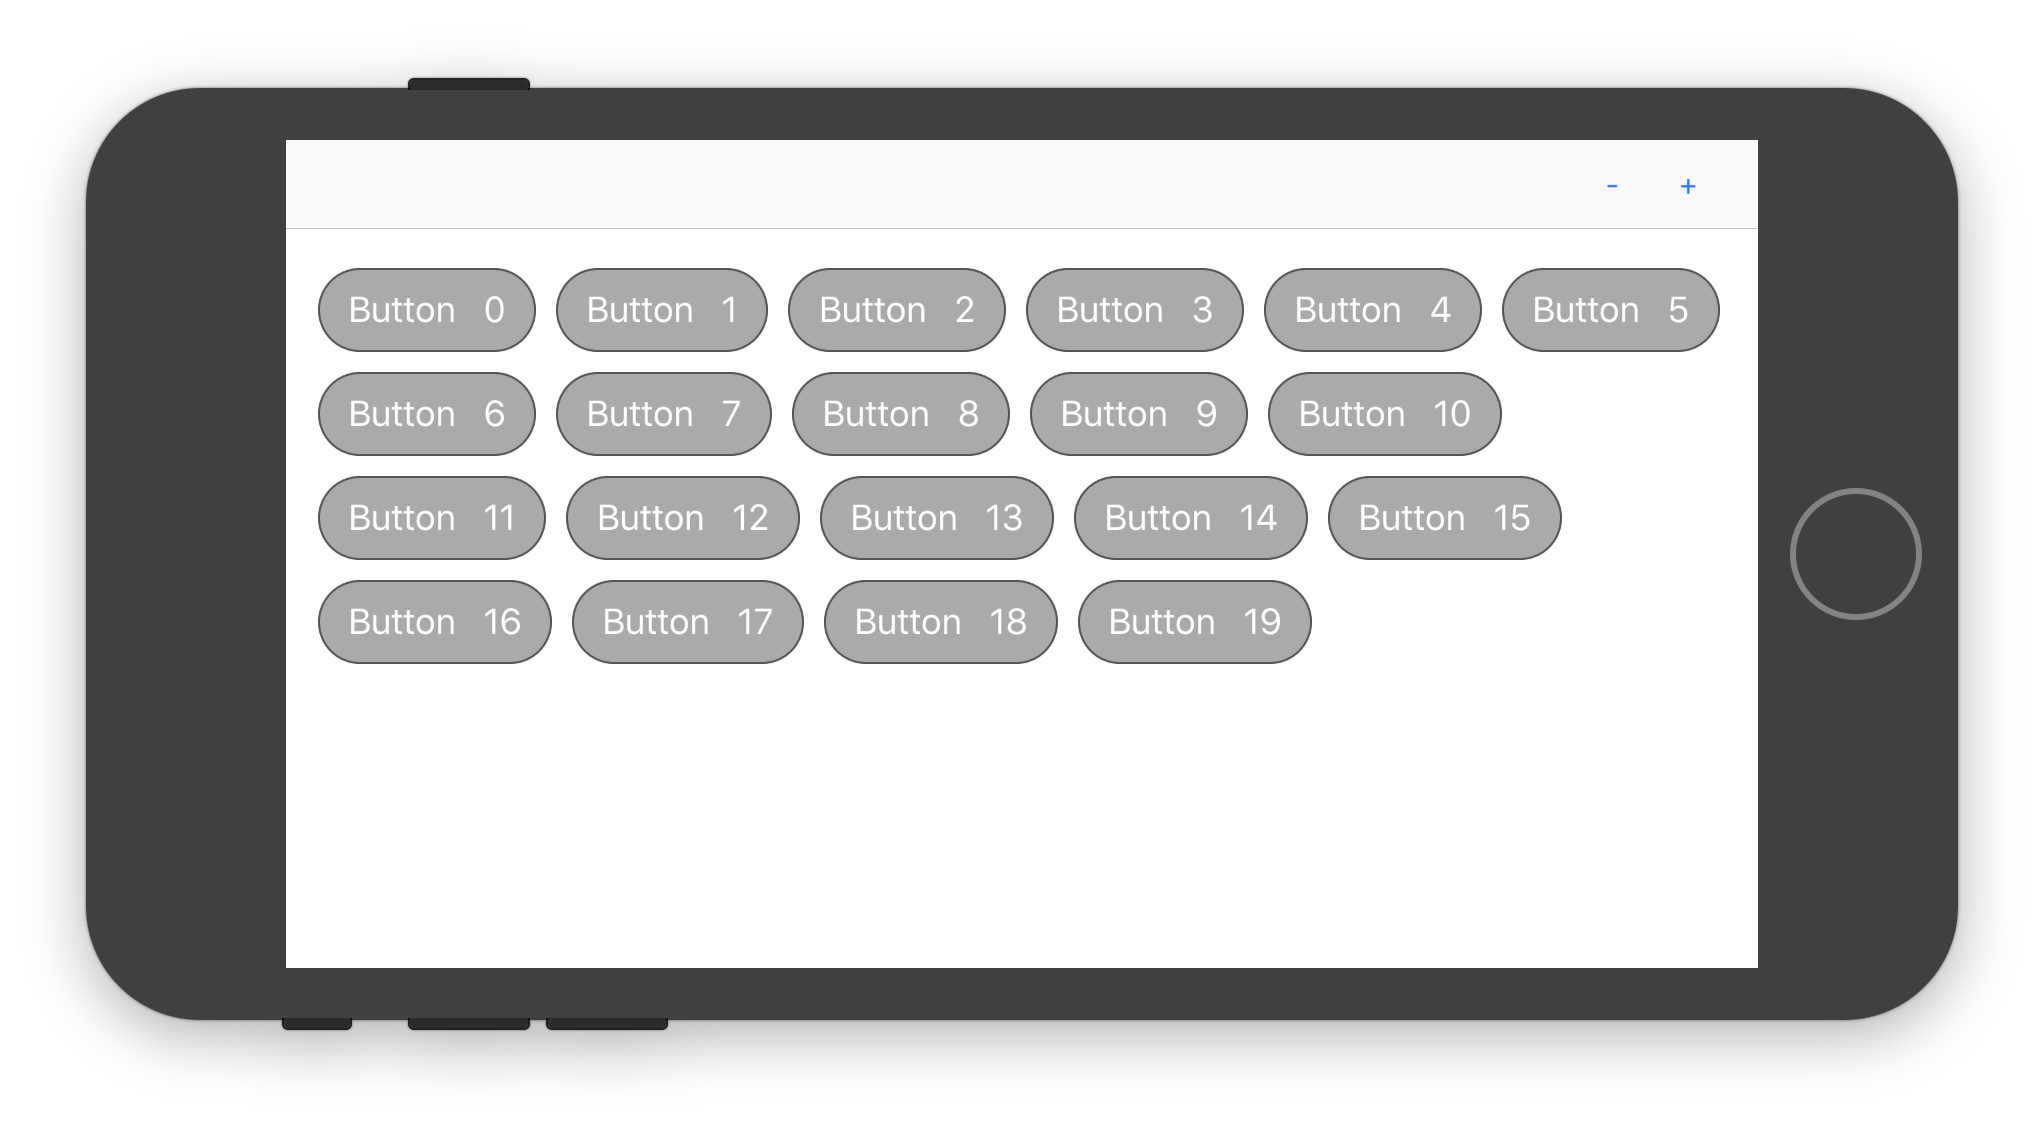
A justified flow layout aligns the left and right elements to the left and right margins and adjusts the spacing in between the elements accordingly. Here's what our starting point looks like, with all lines aligned to the left:
We start by adding some handy extensions on Sequence and Array. We need a way to compute the sum of a sequence, the total width of an array of sizes (with some spacing in between), and the maximum height of an array of sizes:
								extension Sequence where Element: Numeric {
    var sum: Element {
        return self.reduce(0 as Element, +)
    }
}

extension Array where Element == CGSize {
    func width(spacing: CGFloat = 0) -> CGFloat {
        return self.lazy.map { $0.width }.sum + spacing * CGFloat(count-1)
    }

    var height: CGFloat {
        return self.map { $0.height }.max() ?? 0
    }
}
For the justified flow layout, the first step is to break our elements into lines. A line is an array of CGSizes, and we use a for-loop to iterate over the elements, adding each element if it still fits. If the line becomes too wide, we start a new line.
								func justifiedFlowLayout(containerSize: CGSize, spacing: UIOffset, sizes: [CGSize]) -> [CGRect] {
    var lines: [[CGSize]] = [[]]
    for element in sizes {
        let lastline = lines.last!
        let projectedWidth = lastline.width(spacing: spacing.horizontal) + element.width + spacing.horizontal
        if projectedWidth > containerSize.width && !lastline.isEmpty {
            lines.append([])
        }
        lines[lines.endIndex-1].append(element)
    }}

    // ...
After having grouped the elements into lines, we can proceed to compute the frame for each element. We need to calculate the actual spacing between the elements in the line, so that a line fills the width of the container: we add up the elements' widths in a line using line.width(spacing: 0), subtract that value from the container's width and divide it by the number of spaces in the line. Since actualSpacing might not be an integer, we use .integral on all frames to convert any fractional numbers into integers, as setting a frame with fractional numbers can result in blurry rendering.
								    // ...
    var result: [CGRect] = []
    var current: CGPoint = .zero
    for line in lines {
        let width = line.width(spacing: 0)
        let actualSpacing = (containerSize.width - width) / CGFloat(line.count - 1)
        for element in line {
            result.append(CGRect(origin: current, size: element).integral)
            current.x += element.width + actualSpacing
        }

        current.y += line.height + spacing.vertical
        current.x = 0
    }
    return result
}
That's our justifiedFlowLayout function finished. In our ButtonsView, we can change the layout from a flow layout into a justified flow layout by changing a single function call:
								final class ButtonsView: UIView {
    override func layoutSubviews() {
        super.layoutSubviews()

        let sizes = subviews.map { $0.intrinsicContentSize }
        let spacing = UIOffset(horizontal: 10, vertical: 10)
        let frames = justifiedFlowLayout(containerSize: bounds.size, spacing: spacing, sizes: sizes)
        for (idx, frame) in frames.enumerated() {
            subviews[idx].frame = frame
        }
    }
}
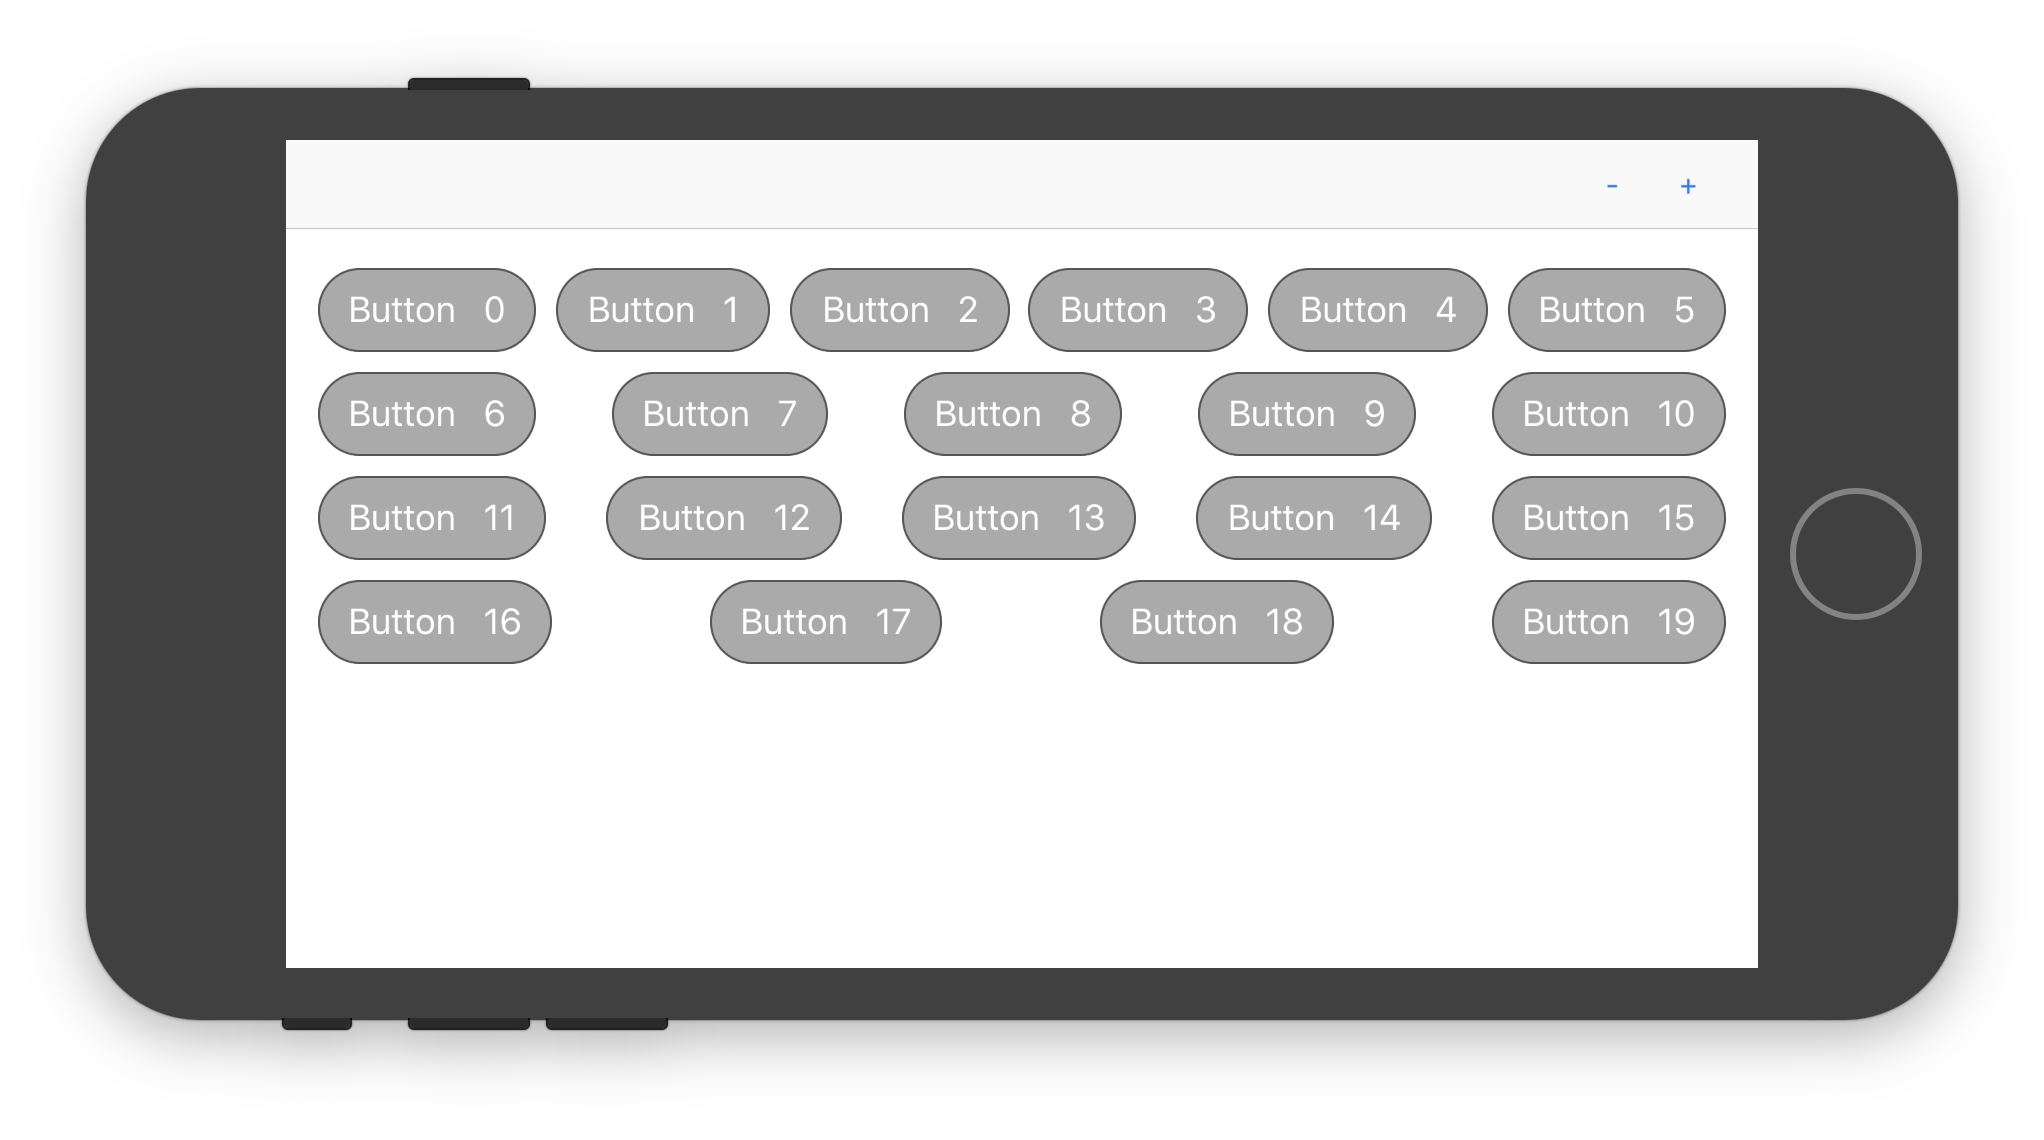
Now our view adjusts the spacing in between elements to make sure the line is aligned to both the left and right margins:
For the implementation of both methods we wrote very procedural code, which seemed the natural way to write it. Swift allows us to write procedural code and have a functional interface, truly the best of both worlds.
